



Creating Slices of Trench Crusade – Part 2
by Dave Taylor

Back in June we shared the first article about the demo tables that I built for the Trench Crusade show booth, first debuted at AdeptiCon, which will be used at conventions visited by the Trench Crusade team. That first table had a lot of elements you might expect to see on a Trench Crusade battlefield – sandbags, duck boards, and walls of earth held in place by sheets of rusted, corrugated metal. I wanted to present a variety of environments that broke with the idea that Trench Crusade is ONLY about crusading in trenches.
This article features two looks that might be a little unexpected.
Byzantine Trenches
For this table I knew I wanted a dusty, desert feel and wanted to incorporate the files from my friend Aaron Dill at Jolly Lark. His Byzantine Trenches currently form the bulk of my personal terrain collection, and I think they give off a great Iron Sultanate vibe. I’m picturing a Heretic Legion raid behind Iron Sultanate lines, with brutal, close-quarters combat fought over supply crates.
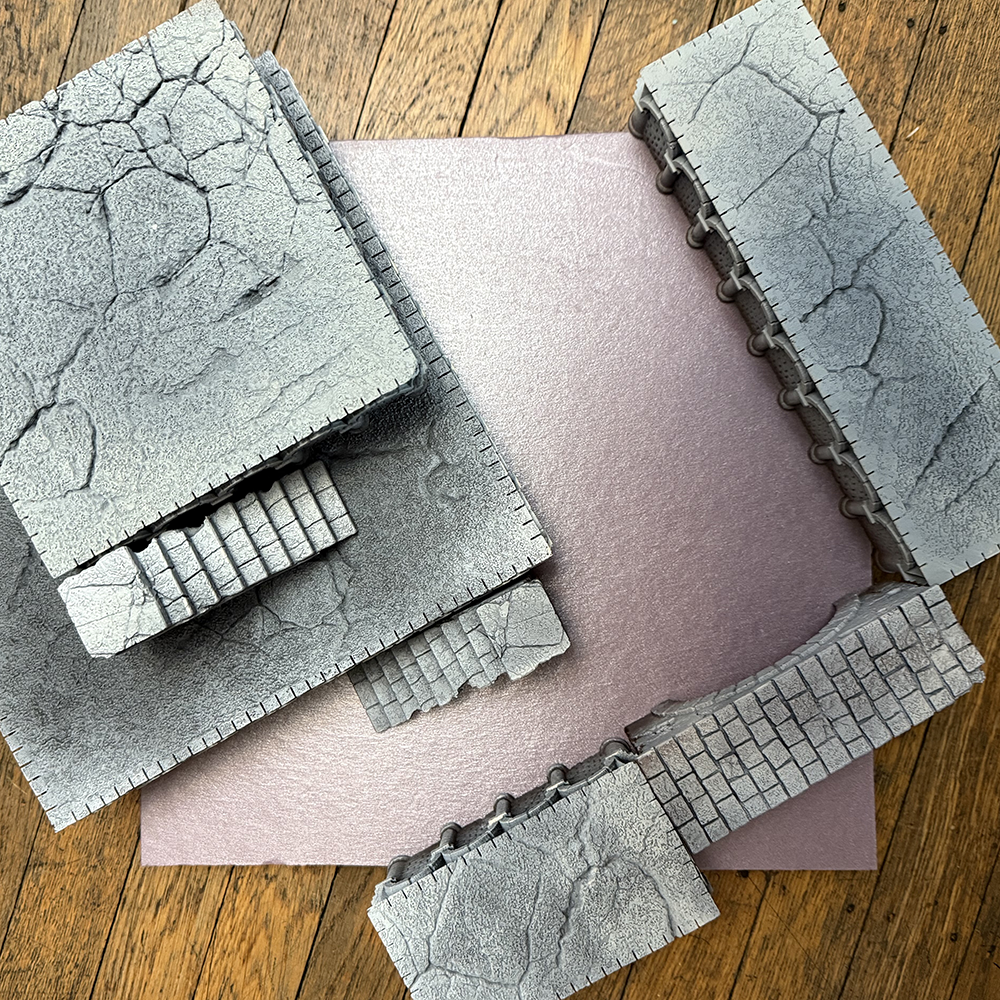
I started by arranging some of the Byzantine Trenches pieces over a 12”x12” table base and taking an overhead photo. I was able to send the photo off to Aaron, who agreed to create a bespoke file for me, merging the elements – stairs, platforms, bridges, etc. – together and slicing through them so they’d fit on the table.
Texturing
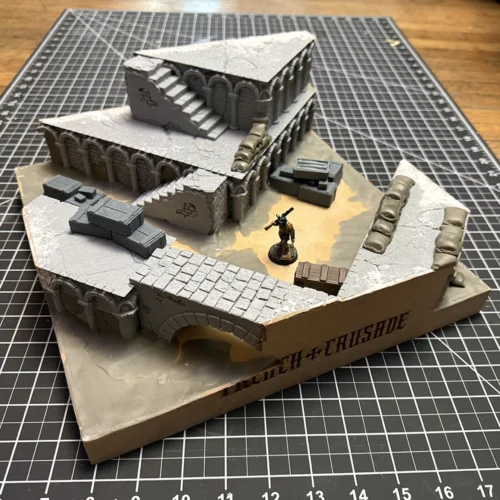
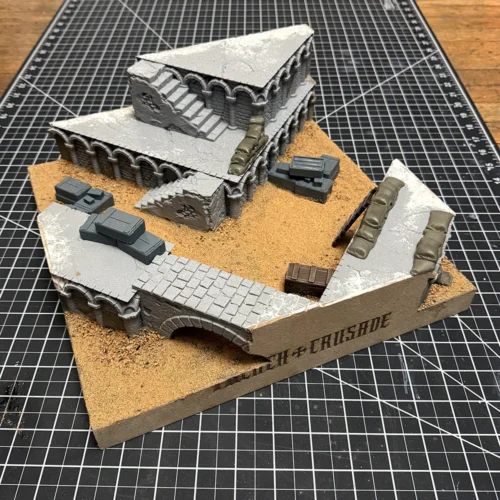
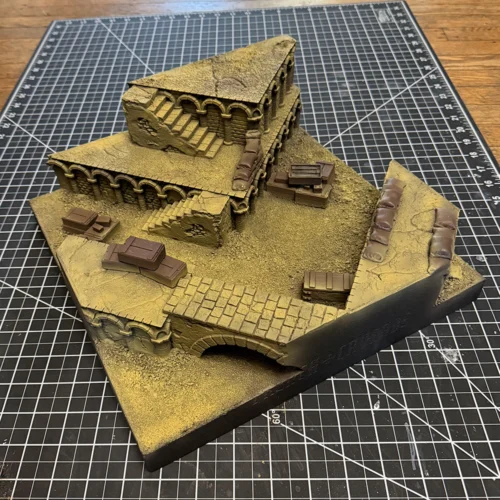
Once they were printed out (on a filament printer), I glued them in place, along with a various crates (from Saucermen Studios) and some sandbag walls made from Apoxie Sculpt putty. I also used some putty to create areas of cracked stucco on the bricks to mimic the stucco on the stairs and bridge. I then added the MDF panels on the sides and filled any gaps.
I used the same two basing grits as on Table One, ensuring the smaller grit brushed up onto the walls for that wind-blown sand look.
Painting
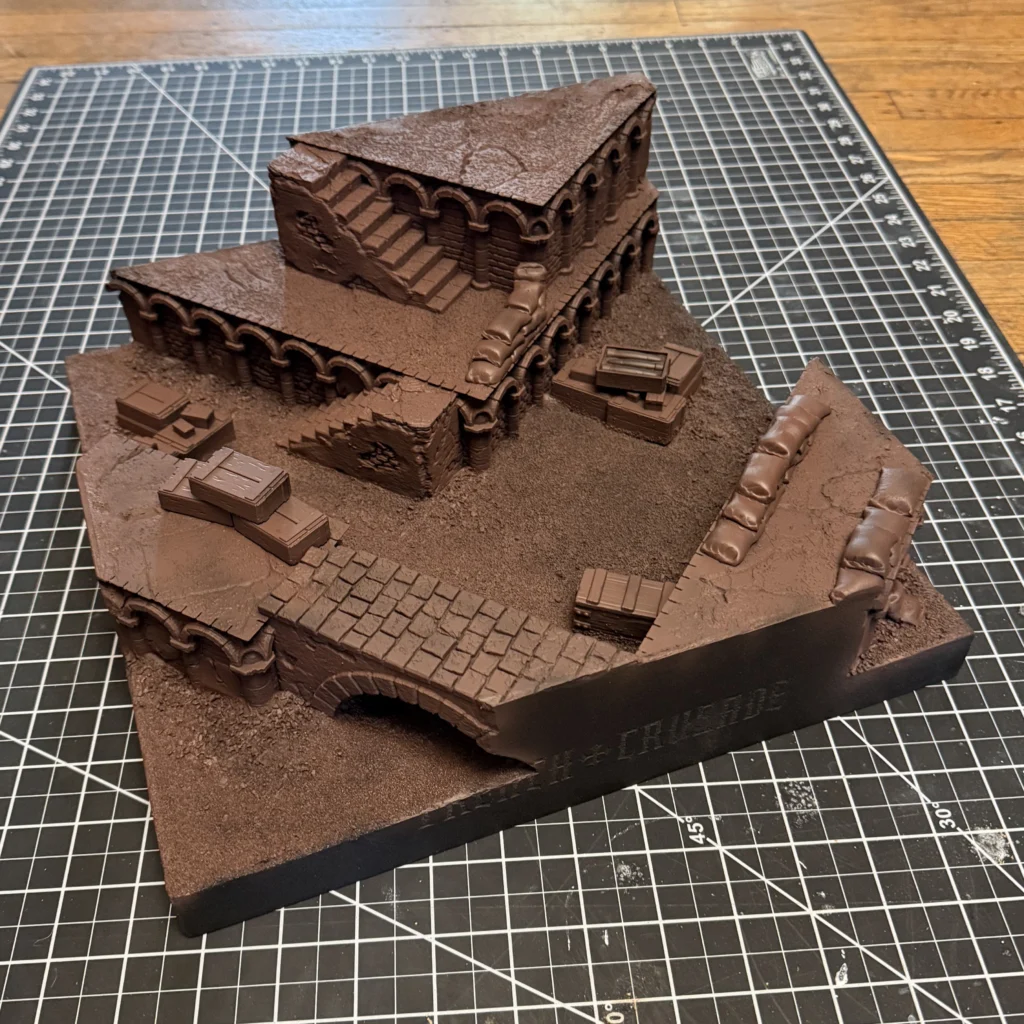
As this table didn’t have any XPS foam, I moved straight into priming with a black spray primer, and then into successive layers of brown, yellow ochre, and bone with my airbrush. To be honest, it was a real treat to see it come together so quickly.
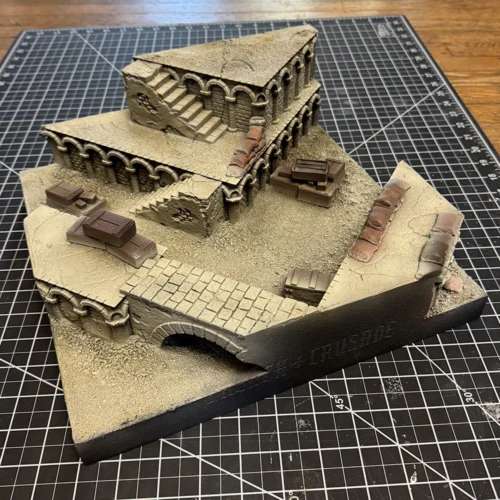
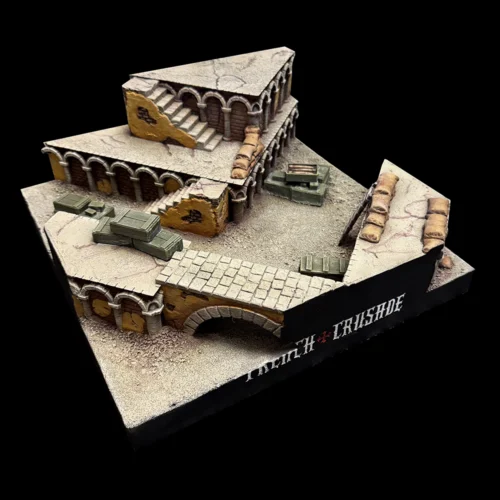
I then moved on to the crates, the sandbags, and the bricks, and the stucco work. I chose a relatively vibrant yellow for the stucco to give a real sense of “faded glory”. These buildings have seen better days, for sure. I wanted to push the dusty feel, so I thinned some pale bone paint and washed it over the crates. To add a little more visual depth, I also thinned down some purple paint and washed it into the cracked upper surfaces to help them pop.
Finally, the sides were painted black and the logos painted white and red.
Carcass of the Behemoth
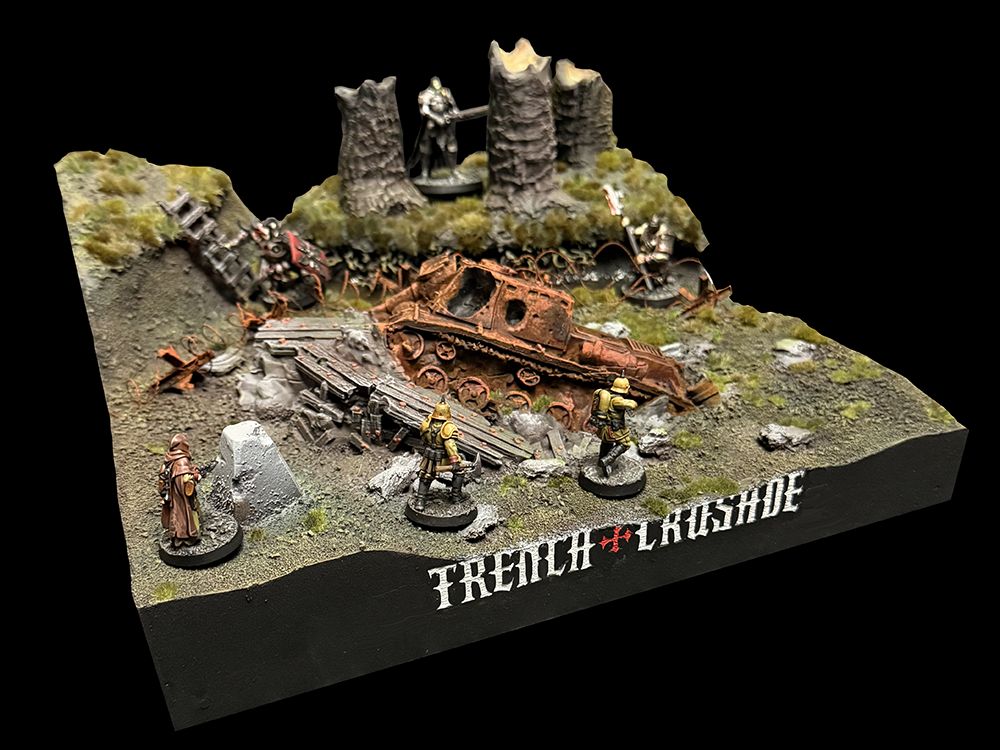
In the early stages of the table layout I knew the wrecked tank (a Destroyed Trench Tank S-ISU from Diceverse) would be the focal point. Initially I played around with a single rising hill that would have a few tree trunks perched up there to add some verticality to the board using some Dead Trees (also from Diceverse). Even at this early stage I wanted to include remnants of some obstacles that might have slowed the tank enough for it to have been assaulted and destroyed. Enter the classic hedgehogs (from Legend Games) which I could also use for stringing barbed wire.
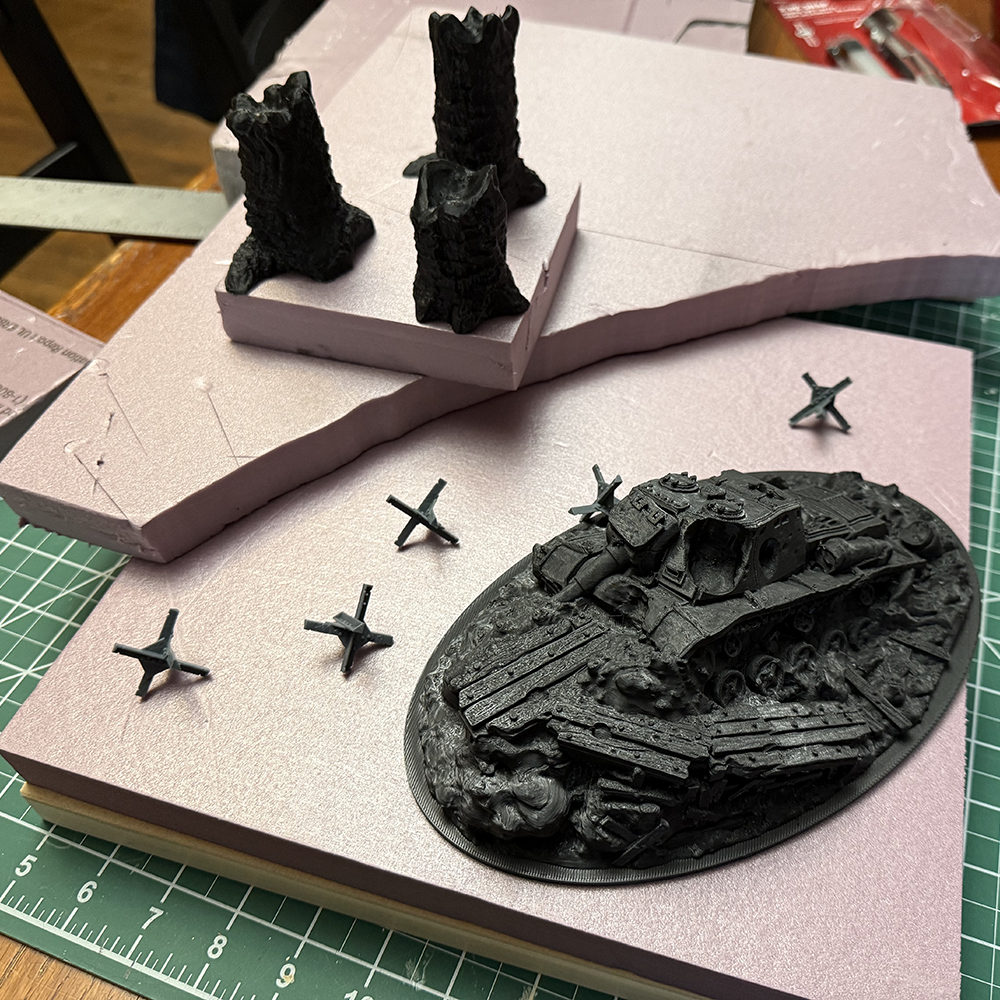
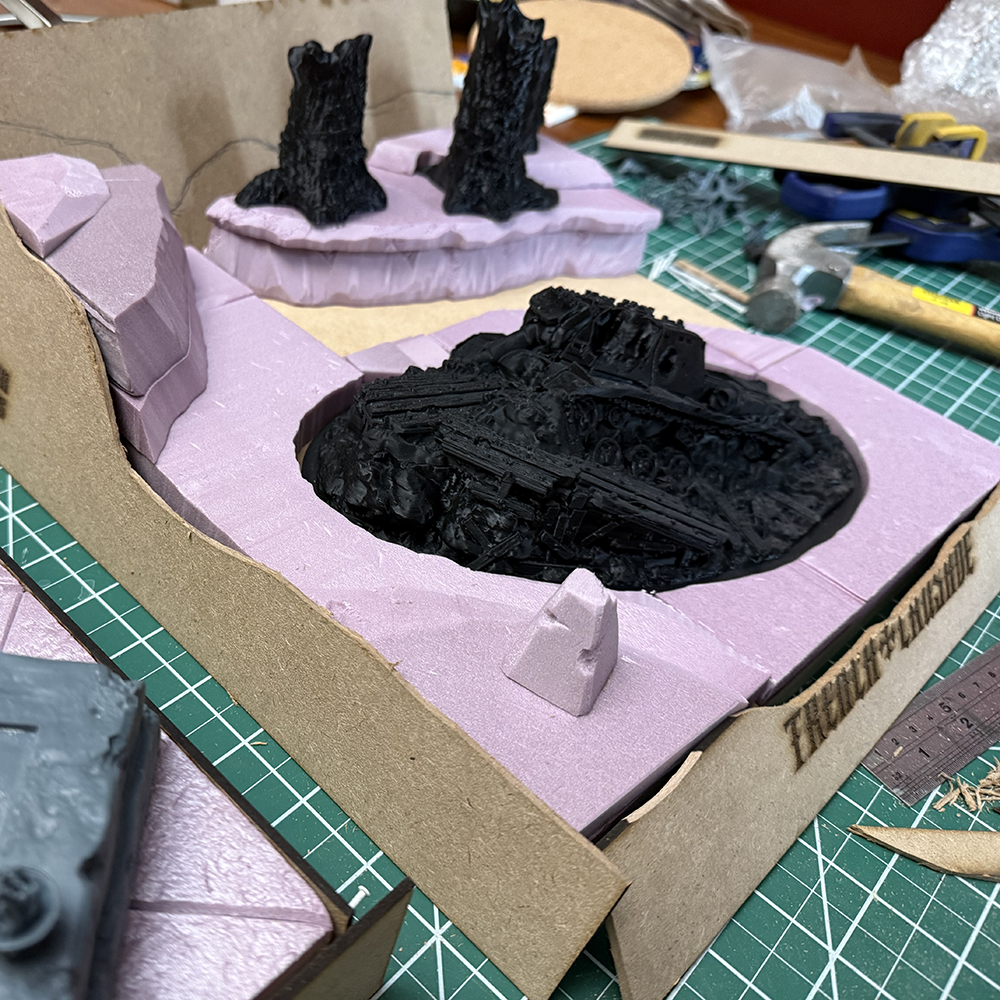
As I played around a bit more with chunks of foam, I realized I could add more drama by building another hill in the corner, and create a “washout” between the two. In my searches through MyMiniFactory.com I had spotted some tree roots and thought they would provide a lovely bit of texture and environmental storytelling. While most of the 3D-printed elements are done in filament, these tree roots (from Zabavka Workshop) are printed in resin for that fine, crisp result.
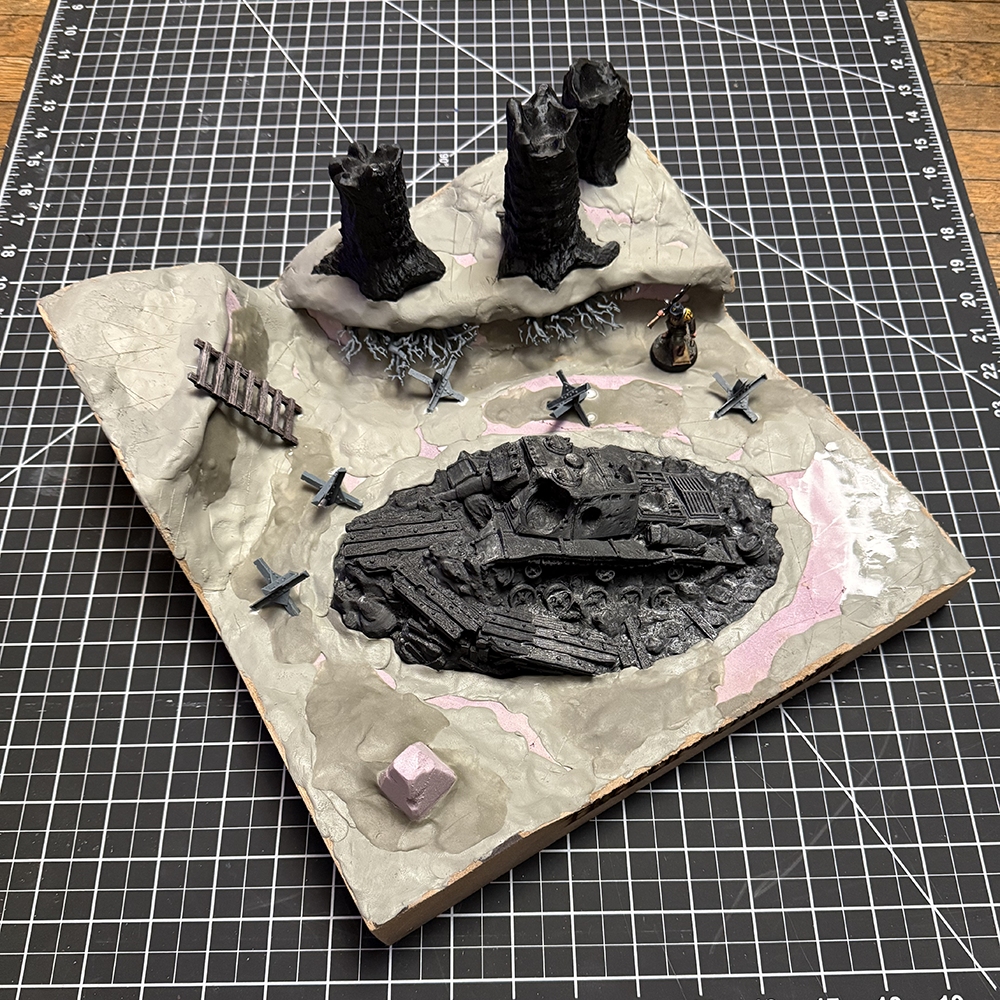
Once I had finalized the rough shape of the table’s undulations, I trimmed the MDF sides and glued them in place. Then I applied a layer of Apoxie Sculpt: a two-part expoxy putty that can add great bulk, be sculpted easily when wet, and cures into a rock solid surface that is wonderfully durable. Perfect for tables that will see a lot of gameplay.

Texturing
Using the same materials from Tables One & Two, I glued some small bark chips in strategic places, primarily to blend the edges of the destroyed tank into the surrounding landscape. Over the bulk of the table surface I glued down a couple of different size grits with wood glue, and then, when the glue had dried thoroughly, I applied a watered-down layer of glue to both lock in the grit and create a protective surface over any areas of exposed insulation foam.
One thing that differed a little for this table was that I applied a layer of Vallejo’s European Mud basing material on to the upper surfaces of the hills. This helped create the initial feel of a decaying forest floor littered with old sticks and leaves.
Painting
Any areas of exposed XPS foam were given a couple of coats of heavy-body black acrylic to protect it from the black spray primer I used on everything else (the accelerants in spray primer can eat away at foam), and then I used my airbrush to lay down some initial layers of color. For this table I used primarily dark browns and greens to establish the basecoats. The trees on the hill side were given a basecoat of a greyish brown, while the tank carcass and the hedgehogs were basecoated with a reddish brown. The various rocks and the concrete tank trap were given a quick spray with some mid-grey.
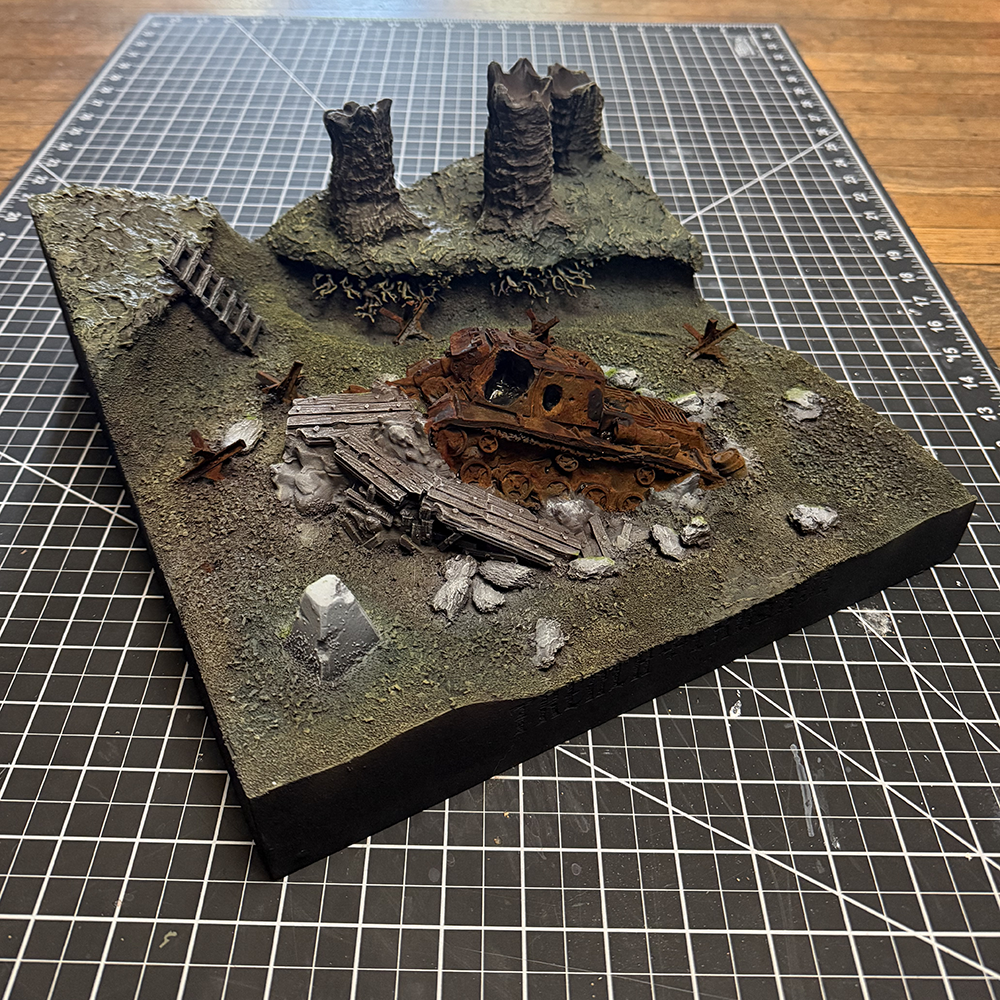
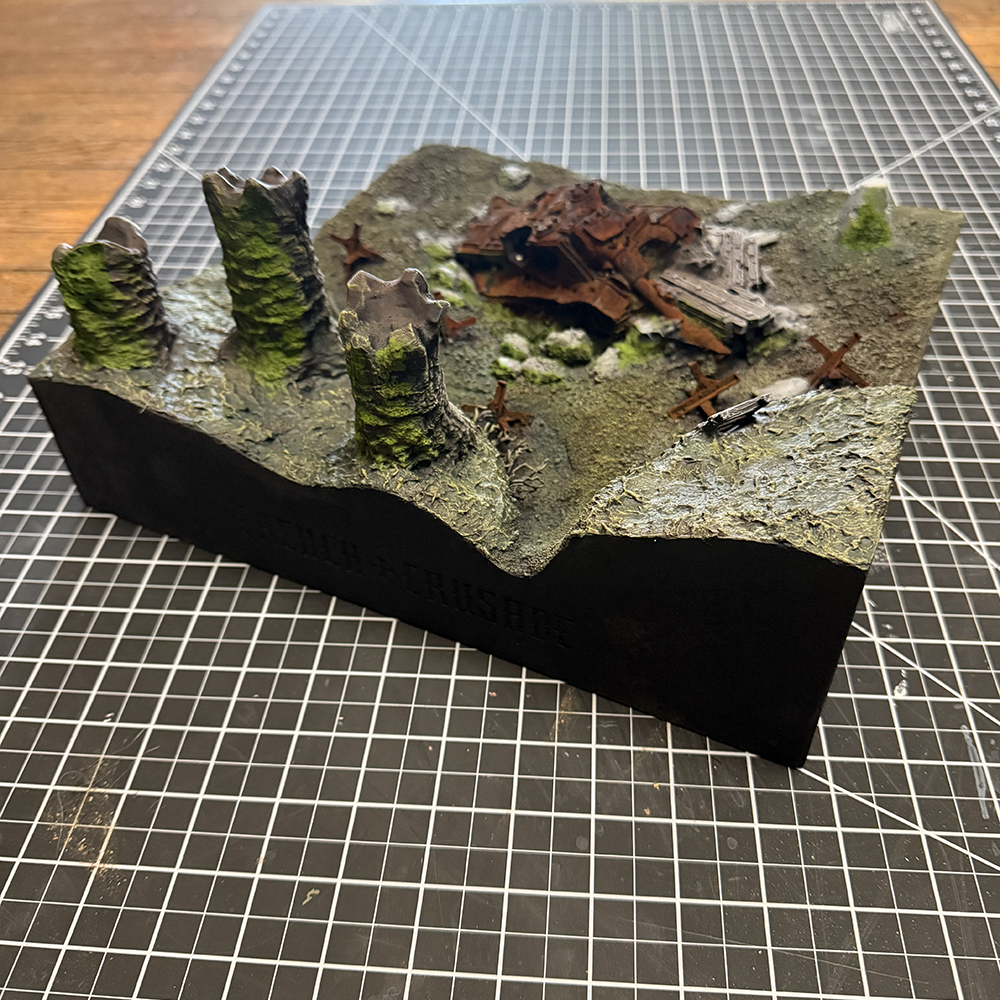
Once the base colors were down, I gave the board a gentle drybrush with a few different layers of grey to tie everything together. I wanted the tank carcass to be the focal point, so it was at this stage that I started layering on Dirty Down Rust effect paint to give it a dangerously corroded look. For the upper highlights I used some of The Army Painter’s Fresh Rust effects paint for that pop.
I wanted there to be a very damp environmental feel about the table, so picked a side and added patches of Dirty Down Moss effect paint to the tree trunks and parts of the tank carcass. The vibrant green looks great and orients you in the scene. You know immediately which direction is north.
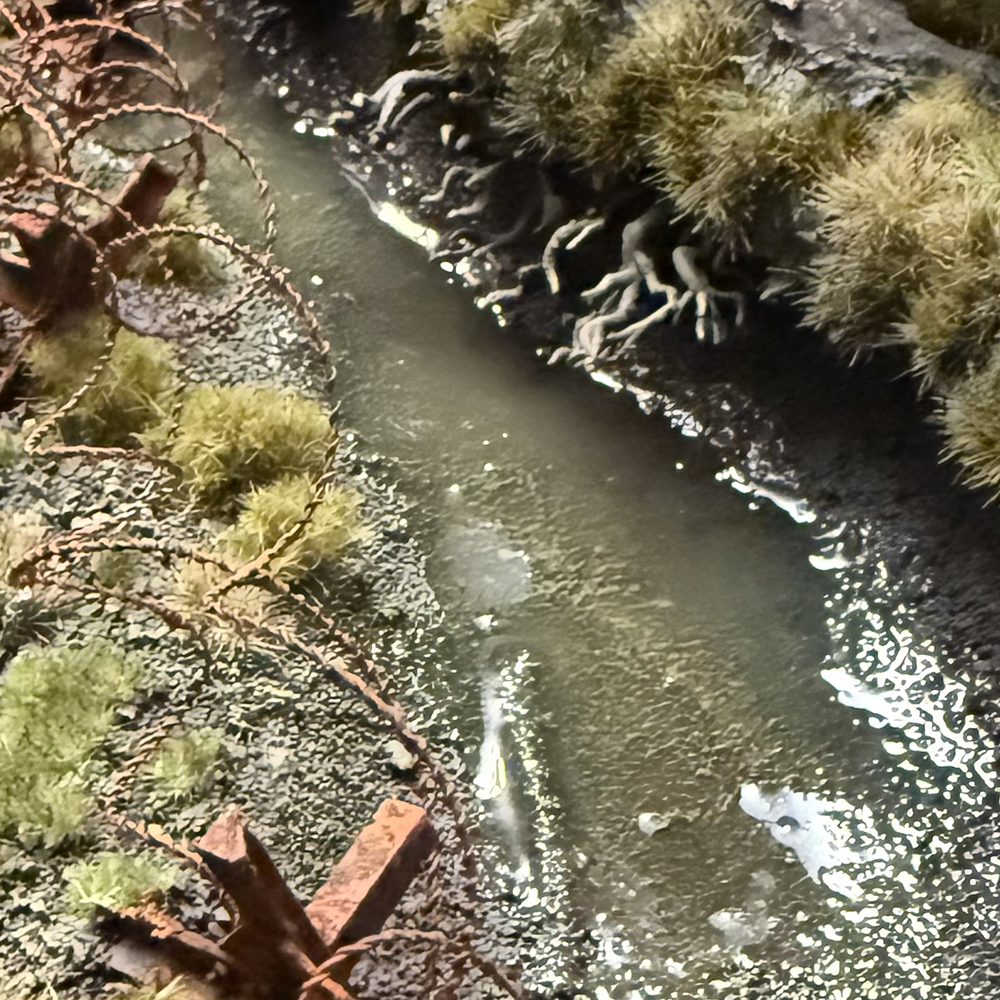
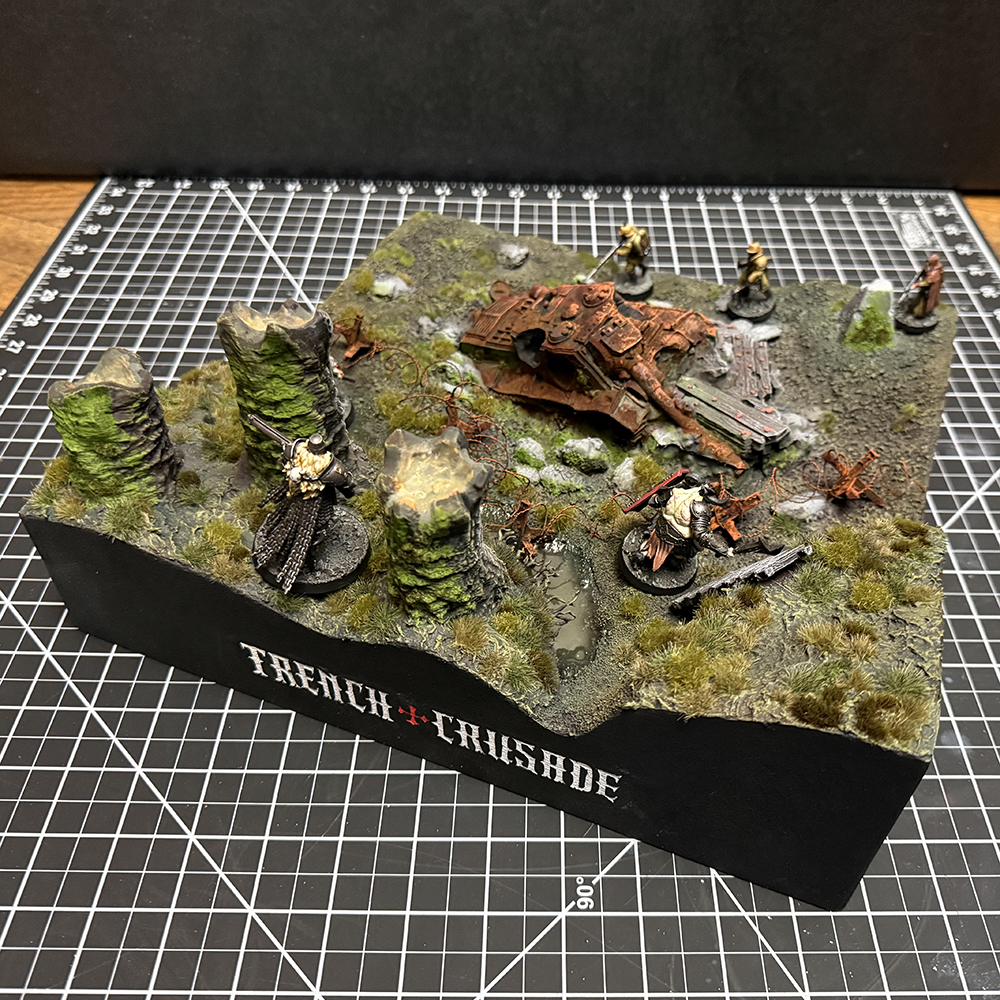
After completing all of the painting and detailing, I started gluing down the scenic tufts. Rather than sticking with a single type of tuft (color and height) and risking the table looking like a golf course, I ended up using six or seven tufts from different manufacturers, to create a more natural and varied look.
I then mixed up some of my AK Standing Water epoxy for my very first resin pour and drizzled it into the washout area under the exposed tree roots. The product was very easy to use and turned out wonderfully, enhancing the damp environment impression I was aiming for.
Finally, the sides were painted with a matt black paint and the logos were picked out in a bright white and red.
Next time…
That’s two more boards done! Look for an upcoming article that will feature some boards by MSTerrainLab in a future edition of The Trench Wire!

Dave Taylor
Dave has been painting miniatures since 1991 and has worked for a number of big names in the toy soldiers industry. He is completely engrossed in the world of Trench Crusade and has painted at least a dozen warbands and almost as many tables for the game. He also publishes books about painting and terrain building for his company, Dave Taylor Miniatures.