



Trench Crusade Basing – Muddy Ground
by Rubén Torregrosa
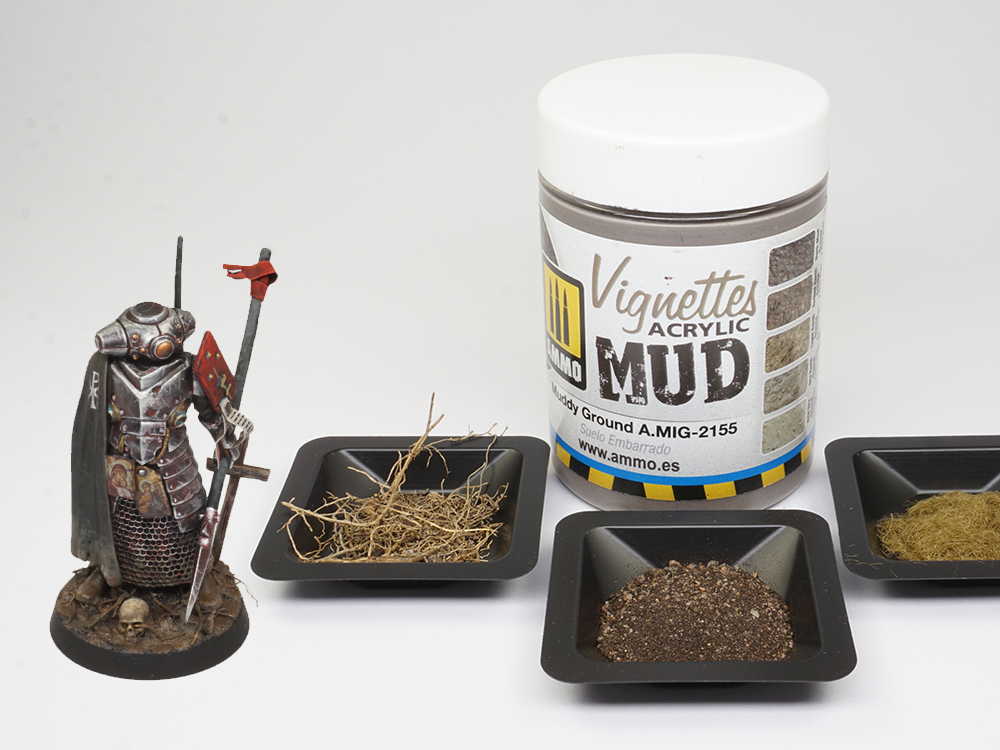
In my opinion, a beautiful muddy base should not be simply painted. It should be built in layers, combining real texture with colour variation and a little controlled randomness. That is what gives the final result its grimdark weight. In this case, we begin with an acrylic groundwork to create volume and hold the extra materials in place, and then we move to enamel products to give the mud a much richer and wetter appearance. This method fits perfectly with the atmosphere seen in many wonderful photos of Trench Crusade warbands, where the base is not secondary but an essential part of the miniature’s story.
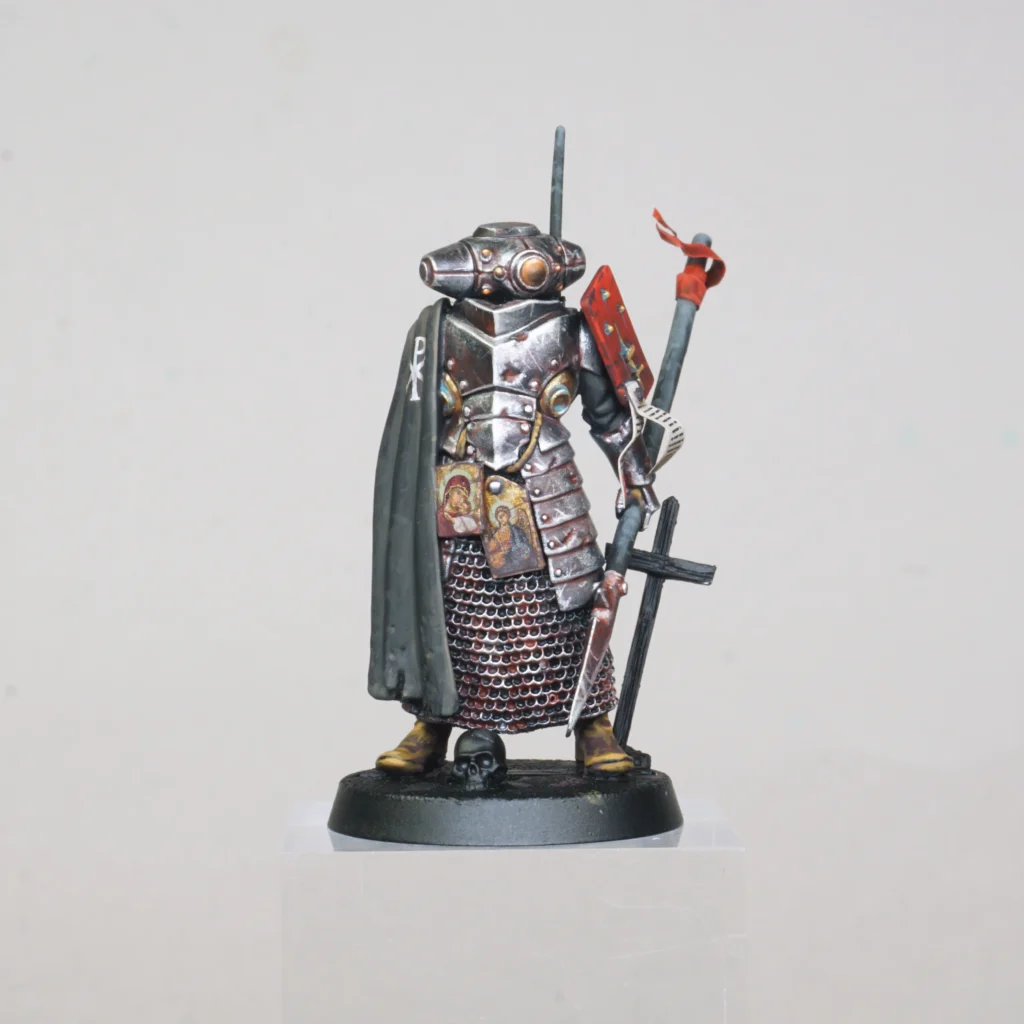
Preparation
Sometimes we can create or decorate the base before starting to paint the miniature. However, mud effects are best created at the very end, once the entire miniature has been painted using your favourite method. This allows us to integrate it into the base better.
Step 1 – Materials
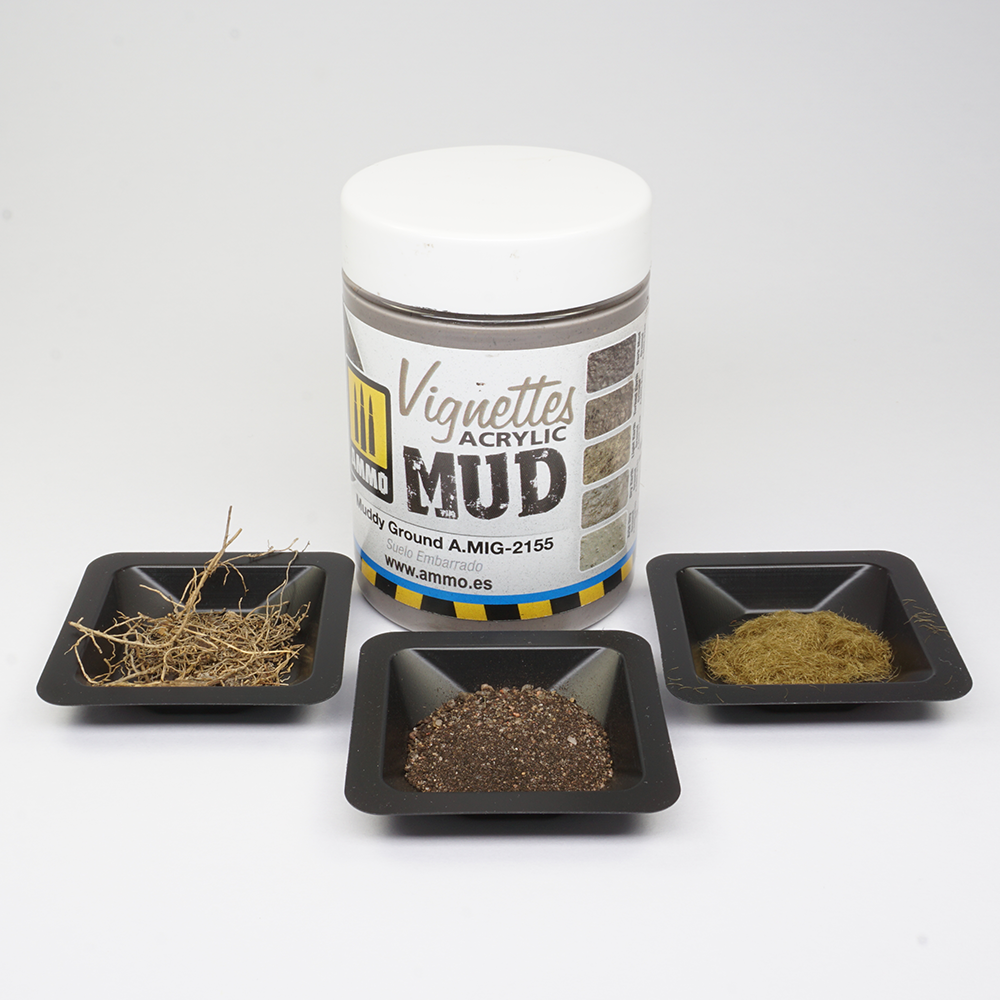
We begin by preparing the materials that will give the mud its natural character. For the main groundwork, we’ll use Muddy Ground A.MIG-2155. This combines both texture and colour. To enrich the surface, we add fine soil, small roots, and a little fibrous vegetation. These additions are important, as a flat texture paste alone can look too uniform. The roots should be broken into smaller fragments, and the soil should be sifted so only the finest particles remain. This ensures a more convincing scale effect.
Step 2 – Create an acrylic mud mixture
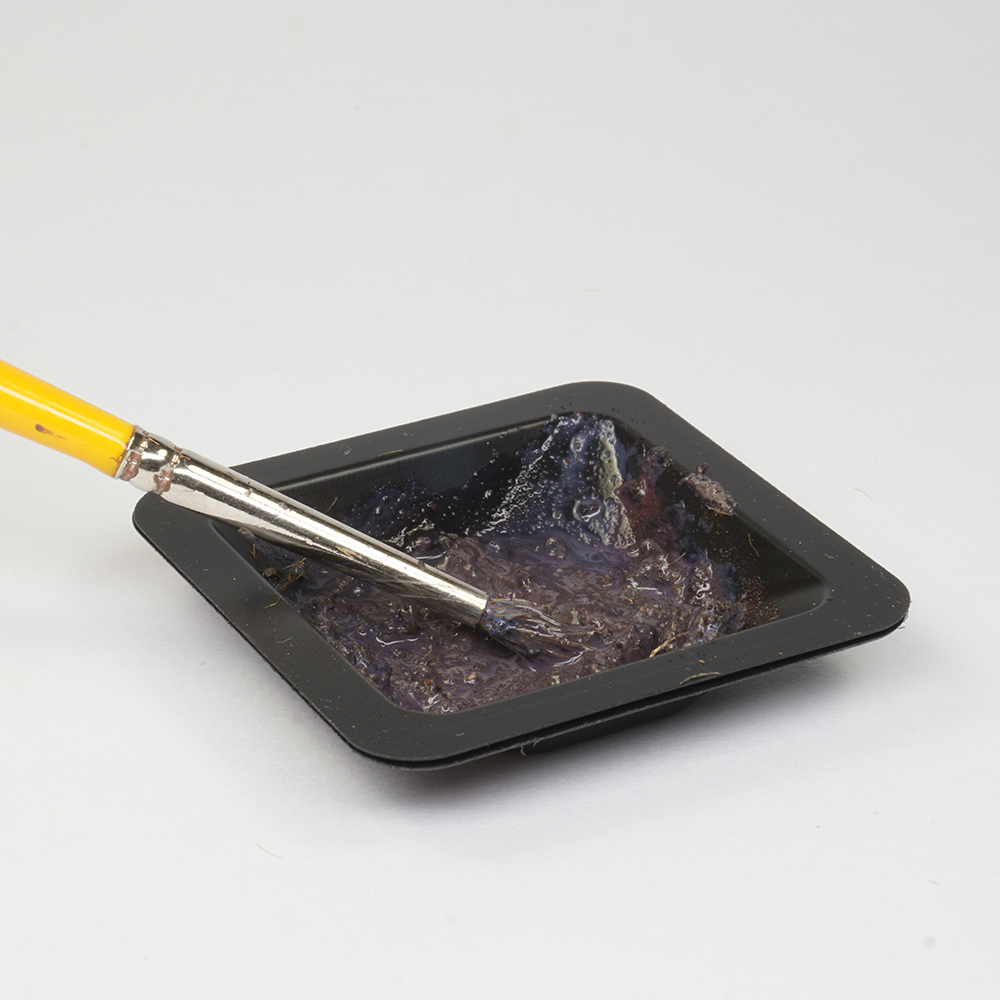
Next, we mix the groundwork on a palette with the natural materials. At this stage, we darken the acrylic mud slightly with Burnt Umber IONIC-0161 and Black IONIC-0172. The aim is a dense but workable paste, thick enough to hold its shape, yet soft enough to spread with an old brush. This is the balance we seek in muddy basing: enough body to create volume, without becoming clumsy or artificial.
Step 3 – Apply the acrylic mud mixture
We then apply this mixture directly onto the base, concentrating it around the boots, the skull, and the lower details. This is a key step, as the mud must visually anchor the miniature to the ground. If the texture only sits around the edges, the model may feel detached. By pushing the mud close to the feet, we create the impression of weight and contact with saturated terrain.

Step 4 – Adding details
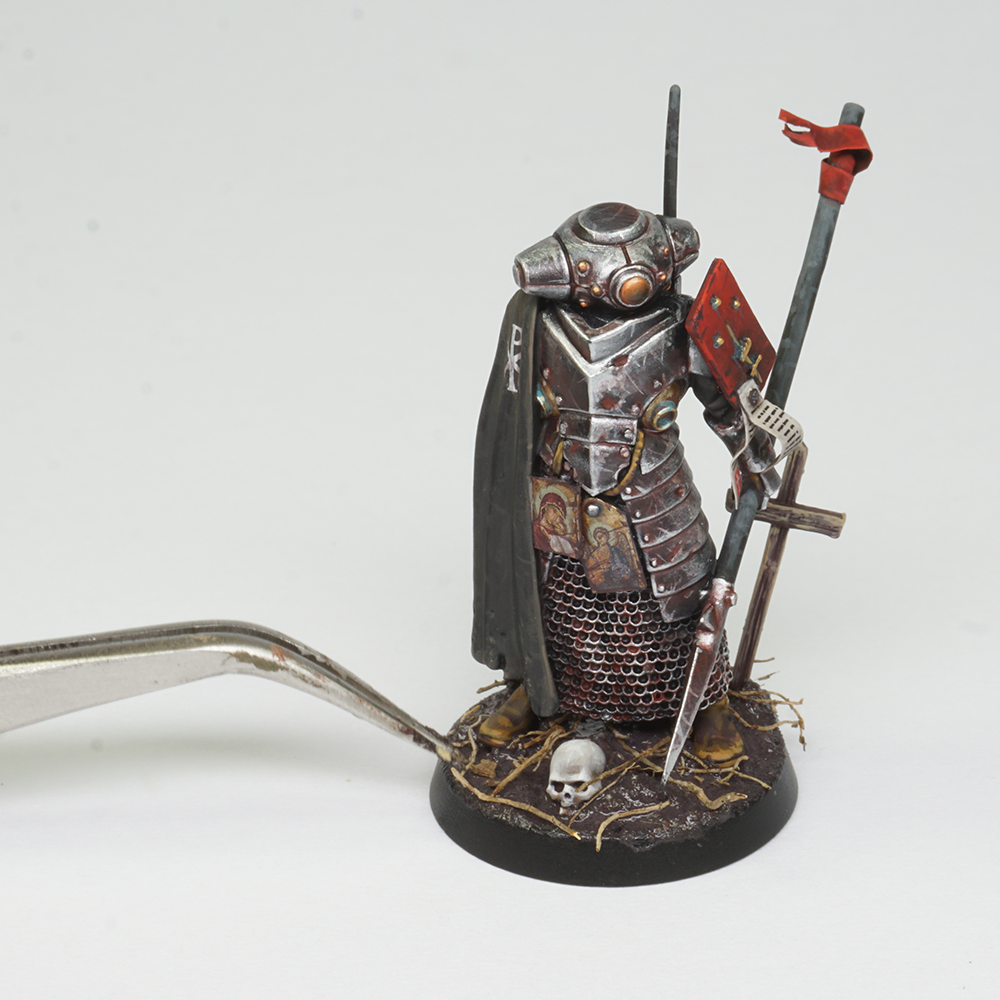
While the acrylic mud is still wet, we place more roots using tweezers. This should be done sparingly. Each element is gently pressed into the paste so it remains embedded once dry. These vertical elements create additional points of interest and reinforce the organic feel of the base.
Step 5 – Drying time
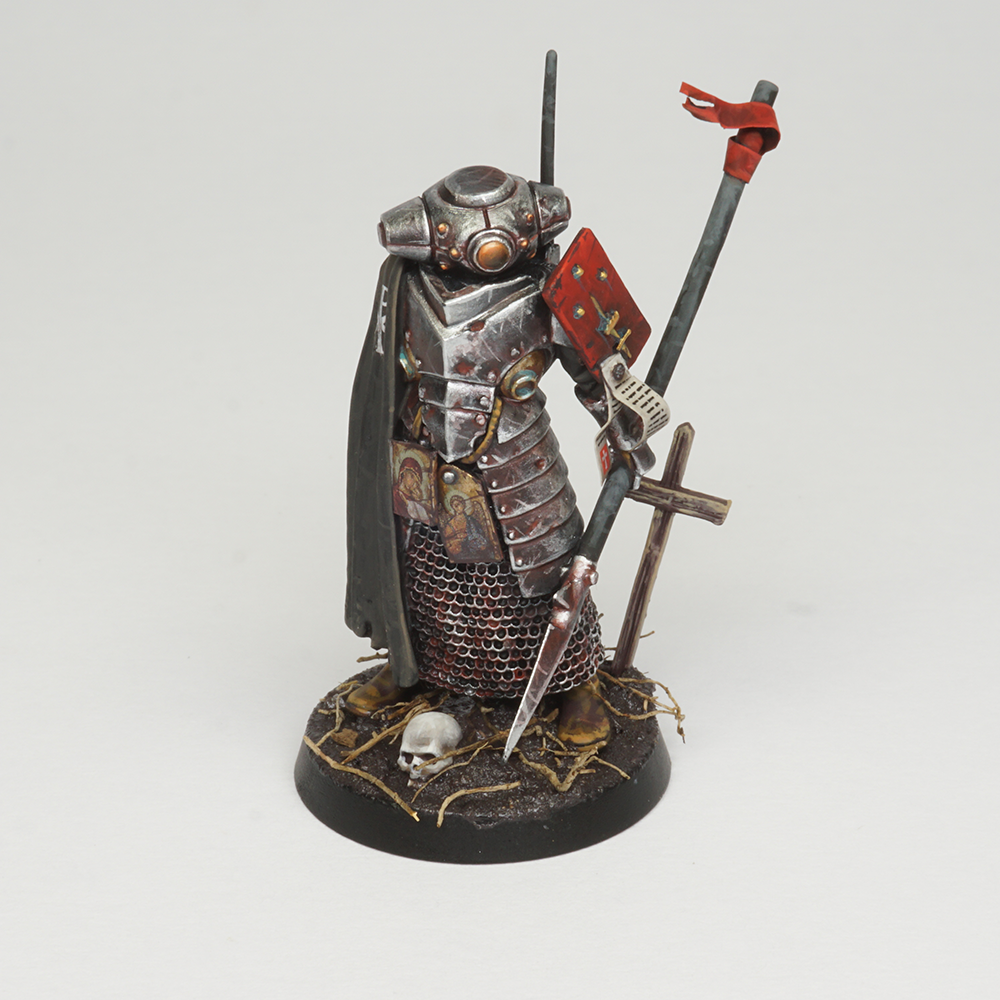
We let it dry completely for 15 to 20 minutes before continuing. Otherwise, we risk damaging the previous layer and losing the texture we have just created.
Step 6 – Enamels
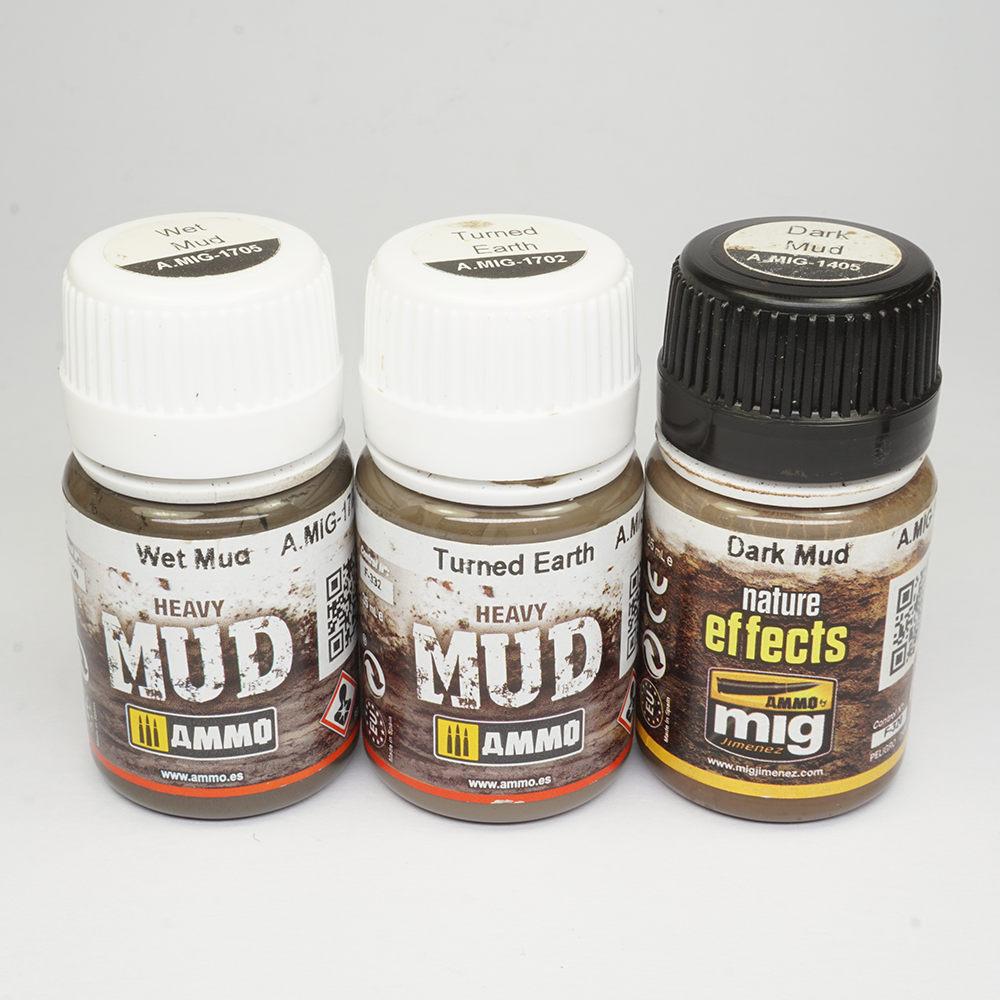
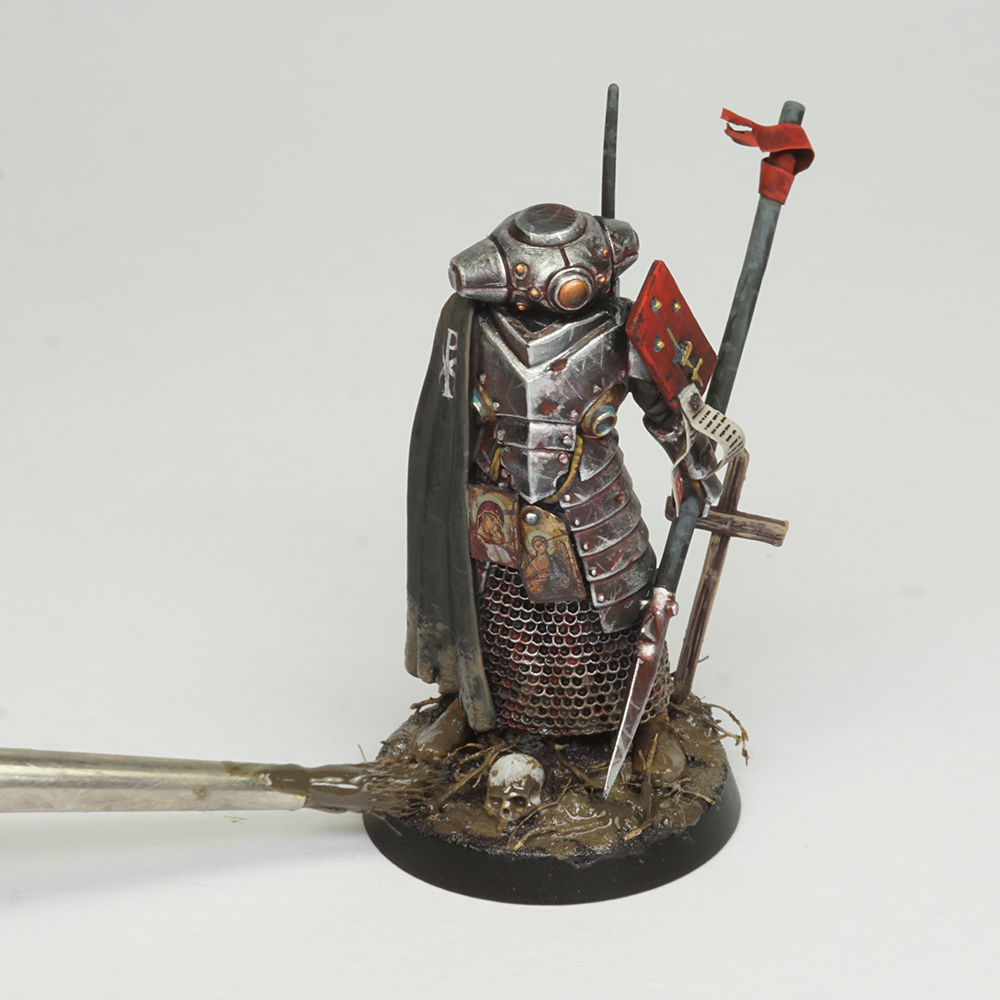
Now, we move to enamel mud effects. We’ll use three tones: Heavy Mud Turned Earth A.MIG-1702, Heavy Mud Wet Mud A.MIG-1705, and Dark Mud A.MIG-1405. This stage transforms the groundwork into realistic mud.
Enamels are ideal because they dry slowly, allowing us to blend them calmly and achieve softer transitions. We also need a specific thinner for enamels, such as white spirit or turpentine, as water cannot be used. This will be used to clean our brushes, and if necessary, we can use a brush slightly moistened with thinner to carefully remove or adjust the enamel on the miniature. Some of these enamels have a satin or slightly glossy finish, which helps to reinforce the appearance of wet mud and enhances the overall realism of the effect.
Step 7 – Dry mud base
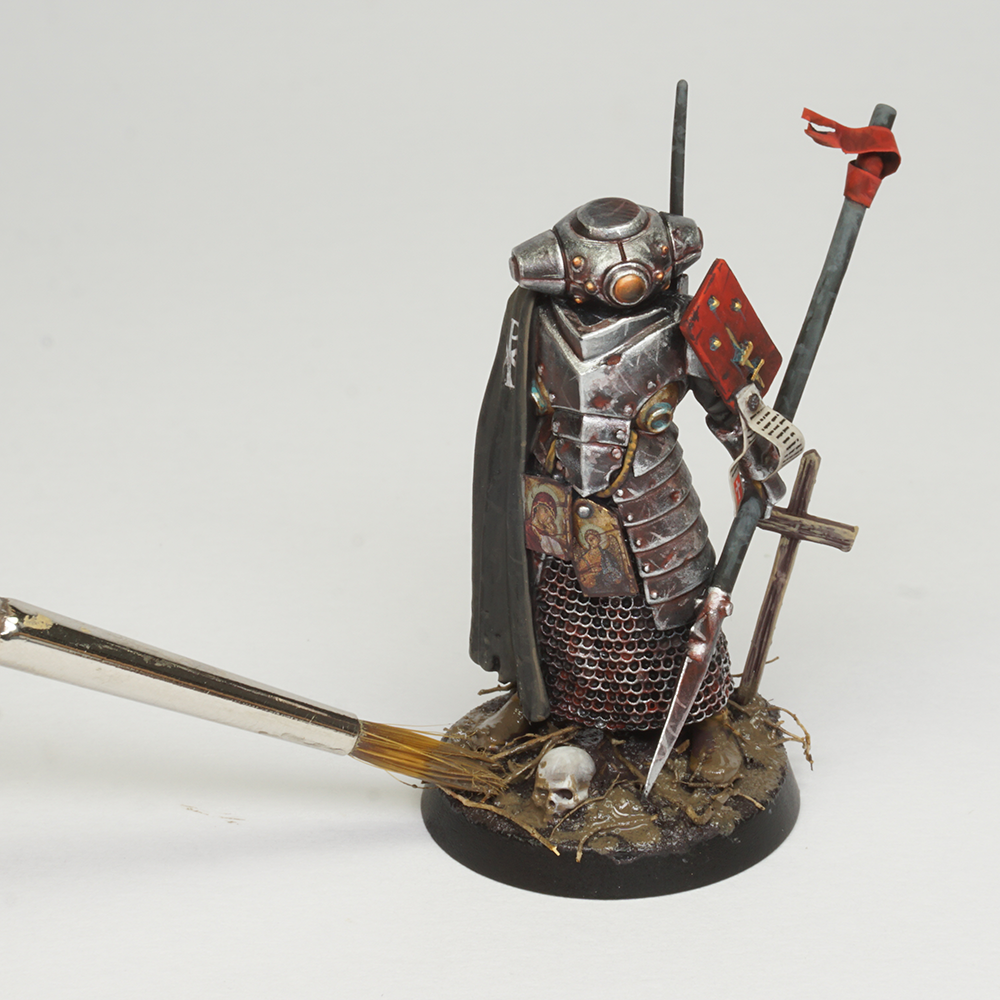
We begin with the driest tone, Heavy Mud Turned Earth A.MIG-1702. It is applied irregularly with an old brush (the more irregular, the better) over the raised areas and selected details. We avoid uniform coverage. This layer introduces a lighter earthy tone that breaks the monotony and suggests areas where the mud is beginning to dry.

Step 8 – Dry mud splashes
This tone can be extended gently onto the lower edges of the miniature, especially around the feet and the cloak. Using another old brush, we apply small amounts with a stippling motion. It is important to remain subtle here. Less is more! If needed, we can clean or adjust the effect using another clean old brush.
Step 9 – Wet mud base
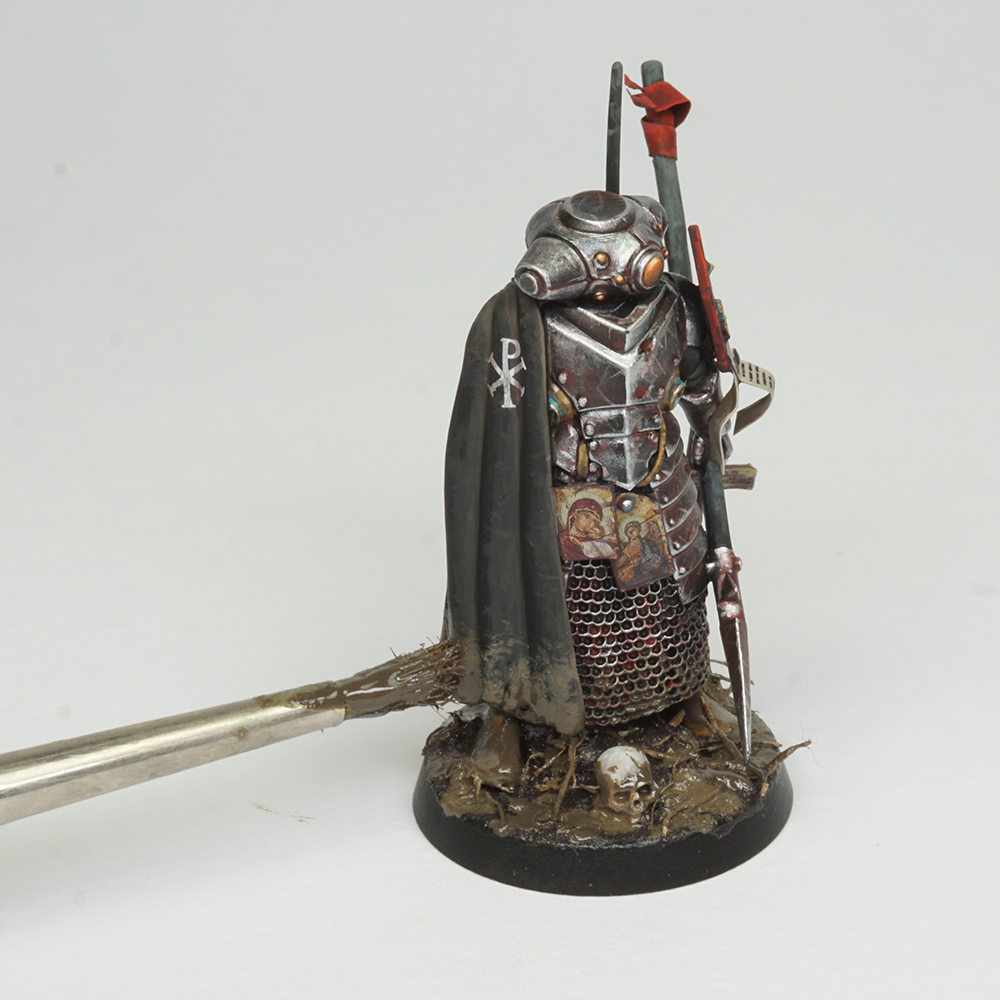
Next, we apply Heavy Mud Wet Mud A.MIG-1703 in the deeper and lower areas, where moisture would naturally accumulate. This darker, richer tone enhances recesses and works especially well around elements such as the skull. It can also be used to create irregular deposits and small accumulations.
Step 10 – Wet mud splashes
On the miniature itself, this tone is applied near the ground contact points, where mud would realistically be dragged and deposited. The contrast between dry and wet areas is what gives the base its realism. We also apply a little bit on the lower part of the cloak and chain mail.
Step 11 – Polishing the splashes
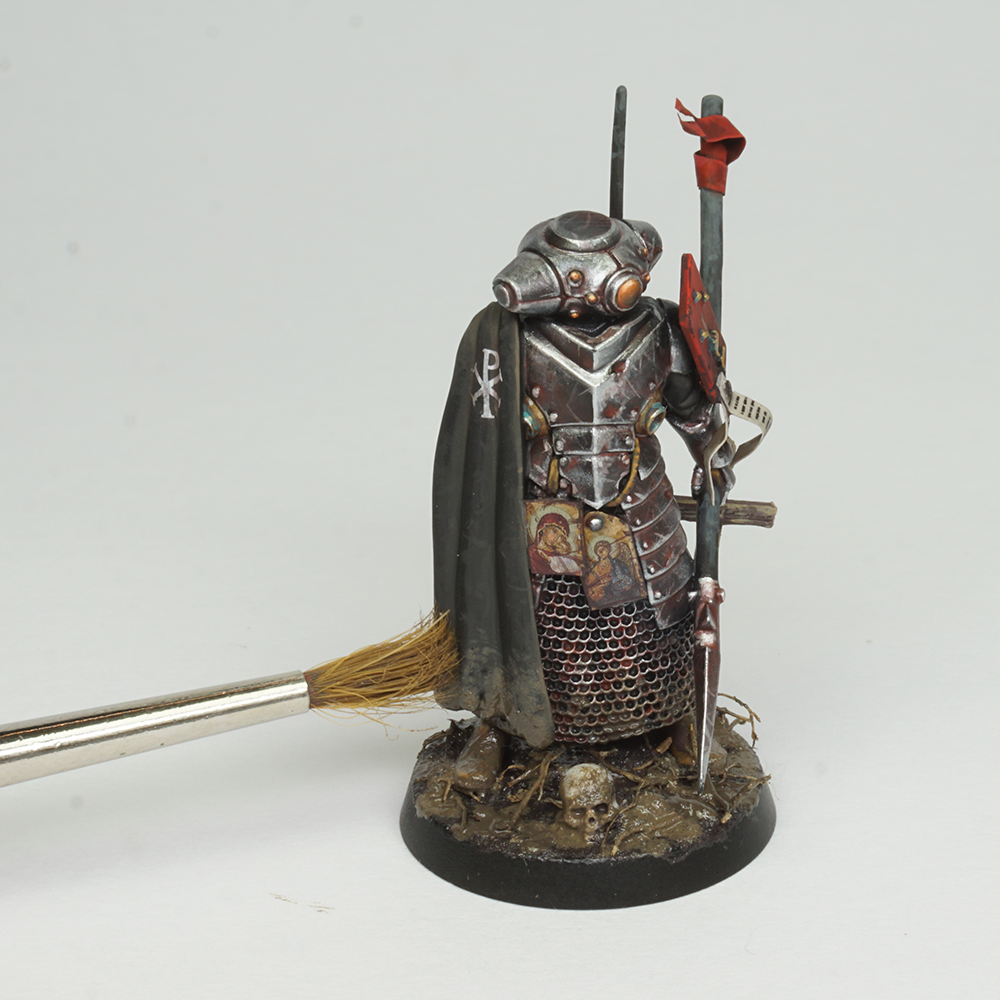
Using a clean old brush with irregular bristles, we gently stipple the surface to refine the splashes on the lower part of the cloak and armour. The aim is to subtly blend the different tones while avoiding large or unrealistic accumulations. This controlled, almost random movement helps to soften transitions and creates a more natural integration between the mud effects and the miniature.
Step 12 – Blending everything
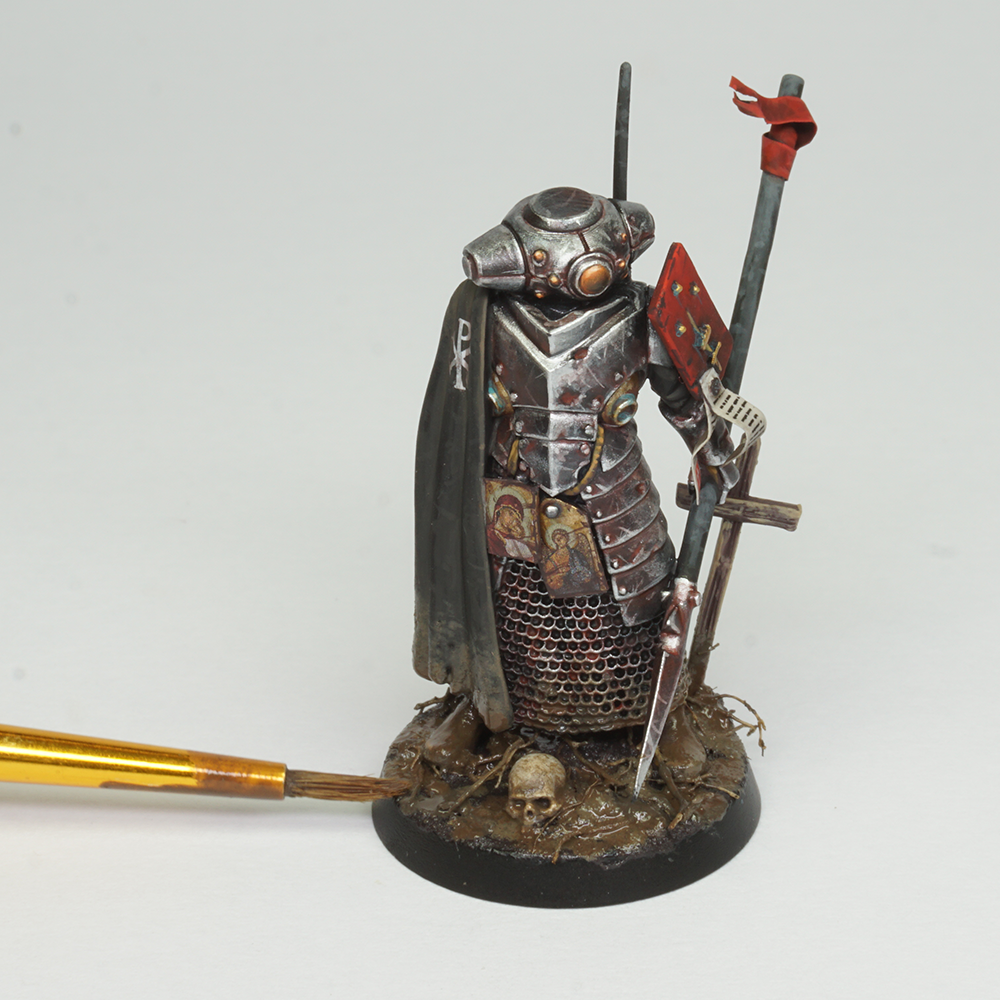
To unify the composition, we use Dark Mud A.MIG-1405. This thinner product acts as a blending filter between the previous layers. It is applied selectively, allowing it to settle in recesses and around thicker deposits. It softens transitions, deepens shadows, and ties all tones together. A small amount can also be feathered onto the lower cloak to reinforce the integration.
Step 13 – Final drying
Finally, we leave the enamels to dry completely, ideally overnight. At first, the effects may appear strong, but they settle naturally as they cure. The final result reads as a layered surface rather than a single product. This accumulation of textures and tones is what creates the illusion of realistic mud.
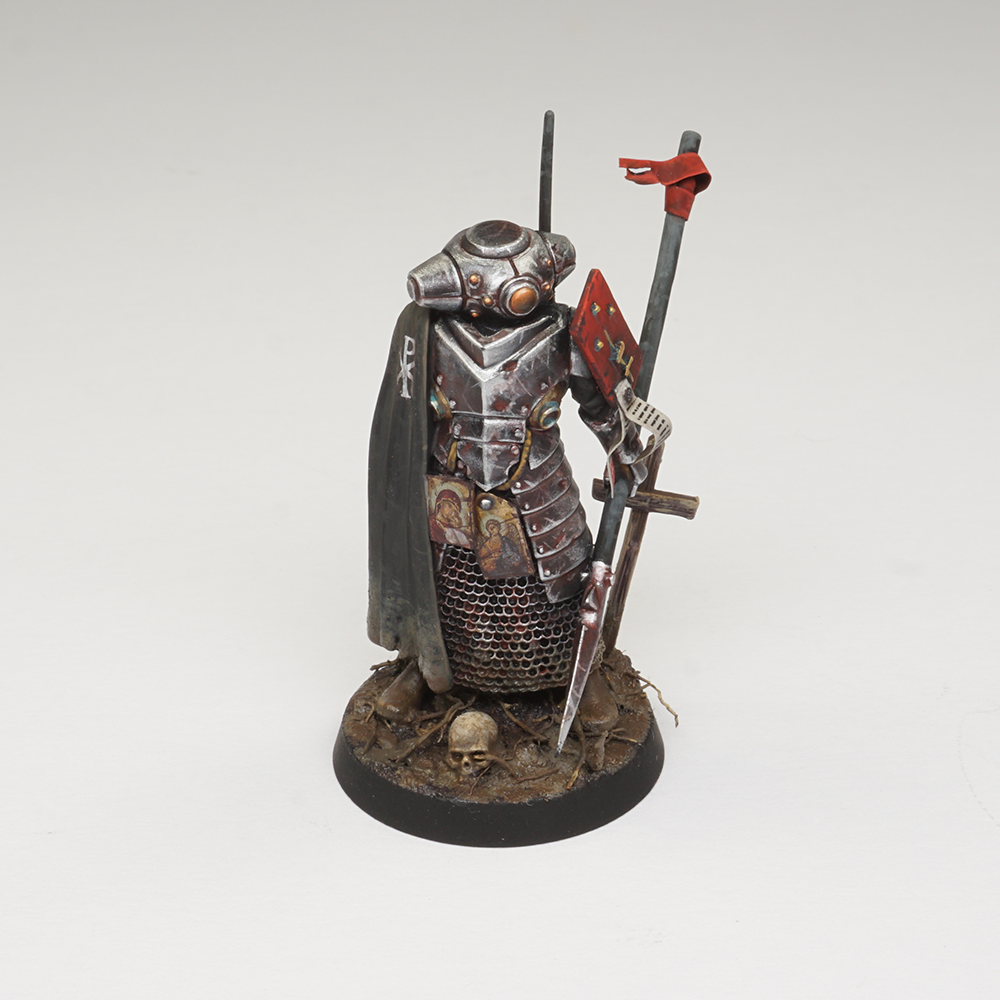

There are obviously many ways to create muddy bases, but we think you’ll agree, Rubén has really nailed a fantastic look on this Observer’s base. You can almost hear the squelching as the mud sucks at its armoured boots. Stay tuned for more great painting articles from Rubén!

Rubén Torregrosa
Rubén Torregrosa is a Spanish expat based in Finland, near the Hellmouth of the North. He works in human stem cell biology while dedicating his free time to miniature painting. His main passion is historical miniatures, though he also paints fantasy and sci-fi miniatures, finding a perfect balance in the Trench Crusade lore. He enjoys creating painting tutorials for magazines, books and other platforms, and sharing his enthusiasm with the community. He was honoured with the first New Antioch Cross for Cultural Merit.